
Thank you for purchasing Silent Dribbler Elite.
Thank you for purchasing Silent Dribbler Elite.
Thank you for purchasing Silent Dribbler Elite.
Thank you for purchasing Silent Dribbler Elite.
This is a paragraph. Click "Edit Text" or double-click the text box to edit your content. Be sure to include any relevant information you want to share with your site visitors.
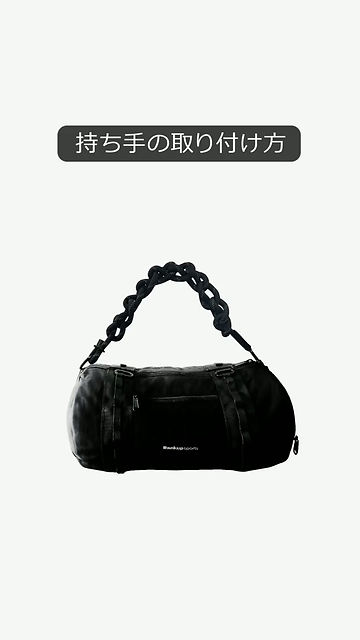
1. Checking the accessories and assembly method
2. Adjusting the tension after use
2. Adjusting the tension after use
3. Band replacement (customization/wear and tear)


This is a paragraph. Click "Edit Text" or double-click the text box to edit your content. Be sure to include any relevant information you want to share with your site visitors.
Thank you for purchasing Silent Dribbler Elite.


<Assembly procedure>
1. Turn the main frame over and remove the caps from the four corners.
(The removed cap will not be used for assembly.)
2. Attach the leg parts to the holes in the four corners and turn them clockwise to secure them.
*Do not tighten too much as you will be adjusting the height later.
3. Turn the unit over and adjust the height.
Just like adjusting a chair , loosen the screws on the legs and adjust them so that all four legs are firmly in contact with the floor.
Assembly is complete.


Thank you for purchasing Silent Dribbler Elite.
This is a paragraph. Click "Edit Text" or double-click the text box to edit your content. Be sure to include any relevant information you want to share with your site visitors.
This is a paragraph. Click "Edit Text" or double-click the text box to edit your content. Be sure to include any relevant information you want to share with your site visitors.
This is a paragraph. Click "Edit Text" or double-click the text box to edit your content. Be sure to include any relevant information you want to share with your site visitors.

<Assembly procedure>
1. Turn the main frame over and remove the caps from the four corners.
(The removed cap will not be used for assembly.)
2. Attach the leg parts to the holes in the four corners and turn them clockwise to secure them.
*Do not tighten too much as you will be adjusting the height later.
3. Turn the unit over and adjust the height.
Just like adjusting a chair , loosen the screws on the legs and adjust them so that all four legs are firmly in contact with the floor.
Assembly is complete.
This is a paragraph. Click "Edit Text" or double-click the text box to edit your content. Be sure to include any relevant information you want to share with your site visitors.
This is a paragraph. Click "Edit Text" or double-click the text box to edit your content. Be sure to include any relevant information you want to share with your site visitors.
<Assembly procedure>
1. Turn the main frame over and remove the caps from the four corners.
(The removed cap will not be used for assembly.)
2. Attach the leg parts to the holes in the four corners and turn them clockwise to secure them.
*Do not tighten too much as you will be adjusting the height later.
3. Turn the unit over and adjust the height.
Just like adjusting a chair , loosen the screws on the legs and adjust them so that all four legs are firmly in contact with the floor.
Assembly is complete.


Thank you for purchasing Silent Dribbler Elite.
This is a paragraph. Click "Edit Text" or double-click the text box to edit your content. Be sure to include any relevant information you want to share with your site visitors.
This is a paragraph. Click "Edit Text" or double-click the text box to edit your content. Be sure to include any relevant information you want to share with your site visitors.
This is a paragraph. Click "Edit Text" or double-click the text box to edit your content. Be sure to include any relevant information you want to share with your site visitors.

<Assembly procedure>
1. Turn the main frame over and remove the caps from the four corners.
(The removed cap will not be used for assembly.)
2. Attach the leg parts to the holes in the four corners and turn them clockwise to secure them.
*Do not tighten too much as you will be adjusting the height later.
3. Turn the unit over and adjust the height.
Just like adjusting a chair , loosen the screws on the legs and adjust them so that all four legs are firmly in contact with the floor.
Assembly is complete.
This is a paragraph. Click "Edit Text" or double-click the text box to edit your content. Be sure to include any relevant information you want to share with your site visitors.
This is a paragraph. Click "Edit Text" or double-click the text box to edit your content. Be sure to include any relevant information you want to share with your site visitors.

<Assembly procedure>
1. Turn the main frame over and remove the caps from the four corners.
(The removed cap will not be used for assembly.)
2. Attach the leg parts to the holes in the four corners and turn them clockwise to secure them.
*Do not tighten too much as you will be adjusting the height later.
3. Turn the unit over and adjust the height.
Just like adjusting a chair , loosen the screws on the legs and adjust them so that all four legs are firmly in contact with the floor.
Assembly is complete.
4. Contact Us
■I can't get it to work even after watching the video...
■I want to adjust the tension more!
■Can it be disassembled and stored?
■I want this color!! etc...
Please feel free to contact us with any questions, no matter how small.
Our professional staff will be happy to assist you!

